
Tarpapel


I used this IM during my demo teaching with DepEd on March 5, 2018 at Tinajero High School in Magalang, Pampanga. I made a PowerPoint presentation of my lesson, but I was told that I had to bring my own projector to be able to present it. I don't have a projector so I had to think of another way to present the lesson to the class in a way that would still be engaging.

Good thing my Grade 6 daughter recently told me about "tarpapel" which one of her classmates shared to her. Just days ago she made her own tarpapel. So I thought why not use her idea in my demo teaching?

So there I was being tutored by my daughter how to make my IM. Here are the steps to make a tarpapel.

1. Open your PowerPoint presentation. Then save it as jpeg.


2.  When prompted with the following question, click every slide.

Then you will see this dialog box.


This means that your slides have been saved as pictures.

3. Open a new excel workbook.


4. Change the view to 10 %.


5. Go to Margins and click Narrow.


6. Insert the picture you want to make into tarpapel by clicking Insert. Then click picture. 


7. Go to the folder where your slides have been saved as jpeg. Then click the picture you want to work on. 

8. Make sure the picture is situated at the topmost right corner of the screen. 


9. Depending on how big your  want your tarpapel to be, you can either expand the picture to occupy two boxes, which would make it as big as two pages, like what's seen below.


When you click on print, you will see the following preview:


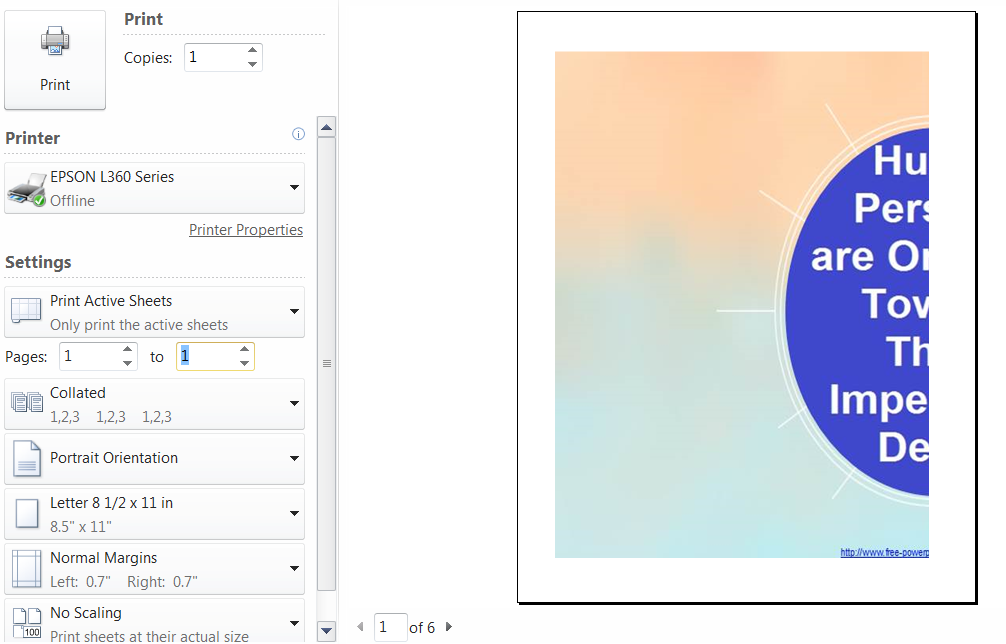
Notice that the document has 6 pages, but only pages 1 and 2 contain the images. So you only need to print these two pages to get your desired picture.

For bigger tarpapel you can expand the image to occupy more boxes. Remember one box equals one page.

10. Once printed cut the margins, then glue the different pieces together to make your tarpapel. 

There you have it, a printed presentation at a size suitable to your audience. 

Comments

Popular posts from this blog

CHART of Ed Tech and Multiple Intelligence I used this chart in my Educ 6 oral presentation. In fact, it was our assignment during our class exhibit of Instructional Materials. I was assigned to make a chart for the exhibit. Thinking of my forthcoming oral presentation, i just put the data on multiple intelligence which i would use in my report. As the saying goes, it was two birds in one stone. I had it printed on a tarpaulin because of its durability. That way i could reuse it multiple times in my future classes or lectures (if ever). My colleagues who might also need such IM in the future can borrow it from me. However, since I'm planning to teach subjects under the HUMSS strand in the senior high, I might be using a chart with a different data on it.
A Compilation of Digital Images In Educ 6, we were asked to do our oral presentation,  which I've already expected having stayed in PNU for almost a year now. Here part of grooming future teachers is to give us a lot of time to practice, not at home but in front of our class. However, this time was different . Unlike our previous oral presentations where we mostly used PowerPoint presentations, this time we we were instructed to use any IM except PowerPoint.  Huh? Why should we be surprised? Educ 6 is on Educational Technology, right? So it's supposed to hone our creative nature (which unfortunately I do not have). After much considerations, I thought of using digital images. After printing them, I had them pasted on card boards and bound them together using two rings. Viola! a small book of images. Anyway, as I was doing them I thought of how difficult it was for the teachers in the past to create their own IM's. To think they also had to write their lesson plan...